Pusher Setup
Overview
Socialswap supports two notification methods for real-time messaging:
- AJAX Polling (Default): Works out of the box, no additional setup required
- Pusher (Real-time): Provides instant WebSocket-based messaging with better performance
This guide will walk you through setting up Pusher for enhanced real-time messaging.
Prerequisites
Before starting, ensure you have:
- Node.js and npm installed on your server/hosting
- Access to your hosting control panel or terminal
- A Pusher account (free tier available)
Step-by-Step Setup
Step 1: Create a Pusher Account
- Visit Pusher: Go to pusher.com
- Sign Up: Create a free account or log in if you already have one
- Create App: Click "Create App" and fill in the details:
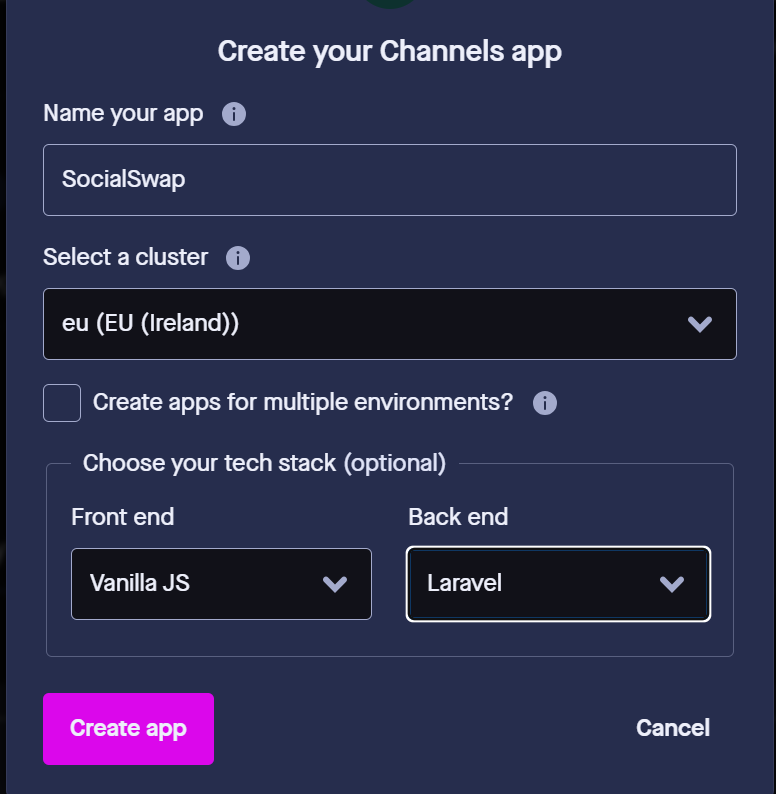
- Get App Credentials: After creating the app, you'll see your credentials:
- App Key
- App ID
- App Secret
- Cluster
Step 2: Install Node.js Dependencies
If you have terminal access:
# Navigate to your project directory
cd /path/to/your/platform

# Install required packages
npm install laravel-echo pusher-js

# Build the assets
npm run build
If you're using shared hosting without terminal access:
- Download Node.js: Install Node.js on your local computer
- Local Setup: Run the npm commands on your local copy of the project
- Upload Files: Upload the generated node_modules folder and updated files to your hosting
Step 3: Configure Environment Variables
Add these variables to your .env file if it is not there yet:
# Broadcasting Configuration
BROADCAST_DRIVER=pusher

# Pusher Configuration (replace with your actual credentials)
PUSHER_APP_ID=your_pusher_app_id
PUSHER_APP_KEY=your_pusher_app_key
PUSHER_APP_SECRET=your_pusher_app_secret
PUSHER_APP_CLUSTER=your_pusher_cluster

MIX_PUSHER_APP_KEY=your_pusher_app_key
MIX_PUSHER_APP_CLUSTER=your_pusher_cluster
Step 4: Clear Configuration Cache
Run this command to clear the configuration cache:
php artisan config:clear
php artisan cache:clear
Step 5: Enable Pusher in Admin Panel
- Login to Admin Panel: Access your admin dashboard
- Go to Settings: Navigate to Settings → Global Settings
- Find Notification Method: Scroll to the "Real-time Notification Method" section
- Select Pusher: Change from "AJAX Polling" to "Pusher (Real-time)"
- Save Settings: Click "Save Changes"
Step 6: Test the Setup
- Open Two Browser Windows: Open your auction platform in two different browser windows
- Login as Different Users: Log in as two different users
- Start a Conversation: Have one user send a message to another
- Verify Real-time: Check if messages appear instantly without page refresh
Troubleshooting
Common Issues and Solutions
Issue 1: "Echo is not defined" Error
Solution:
- Ensure you ran npm run build after installing dependencies
- Check that node_modules folder exists in your project root
- Verify Pusher credentials in .env file
Issue 2: Messages Not Appearing in Real-time
Solution:
- Check browser console for JavaScript errors
- Verify Pusher credentials are correct
- Ensure BROADCAST_DRIVER=pusher is set in .env
- Clear browser cache and reload the page
Issue 3: Node.js Not Available on Hosting
Solution:
- Use a hosting provider that supports Node.js (VPS, dedicated hosting)
- Consider using a local development environment to build assets
- Upload the built assets to your hosting
Issue 4: Pusher Connection Fails
Solution:
- Check your Pusher app credentials
- Verify the cluster region matches your selection
- Ensure your domain is allowed in Pusher app settings
- Check if your hosting blocks WebSocket connections
Debug Mode
Enable debug mode to see detailed error messages:
in .env, add APP_DEBUG=true
Check these locations for error messages:
- Browser Console: Press F12 and check the Console tab
- Laravel Logs: Check storage/logs/laravel.log
- Pusher Dashboard: Monitor connections in your Pusher app dashboard
Fallback System
The system automatically falls back to AJAX polling if:
- Pusher is not configured
- WebSocket connections fail
- Pusher credentials are invalid
This ensures messaging always works, even if Pusher setup fails.